How to Install Kali Linux: The Complete Guide

In this tutorial, you will learn how to install Kali Linux step by step.
Kali Linux is one of the most popular Linux distros, and it is particularly popular among security researchers, testers, as well as hackers.
Offensive security is the team behind Kali Linux. It is a Debian based security distribution.
It comes preloaded with tons of well known and popular security tools, which is one of the main reasons why Kali Linux is so much popular among users.
Kali Linux is used by cyber-security experts, ethical hacking and network security assessments and it is one of the best Linux distros.
So, in this article, we will look at how to install Kali Linux.
Installing Kali Linux Step by Step
Different Installation Options
When it comes to installing Kali Linux, there are several options like:
- Kali Linux hard disk install
- Installing Kali Linux on a bootable USB drive
- Installing Kali on VMware or VirtualBox using virtualization software
- Dual-booting Kali Linux with other OS like Windows or mac
In this article, we will be installing Kali Linux on the hard disk. And we keep others aside for other articles.
System Requirements for Installing Kali Linux
While installing Kali Linux, you should make sure that your system fulfils the requirements, to make sure that Kali Linux works perfectly and without any issues.
- Kali Linux requires a minimum of 20 GB disk space for installation.
- Minimum 1 GB RAM for i3686 and amd64 architectures and recommended 2 GB or more.
- CD-DVD Drive or USB boot support.
Step 1: Create a Bootable USB
For installing Kali Linux, you need to create Kali Linux bootable USB. For creating a bootable USB, first of all, you need a USB and Kali Linux ISO.
1. Firstly, download Kali Linux ISO.
2. Now, in this step, we will write the ISO to the USB. For this, we are going to use the "dd" tool.
Firstly, use the following Linux command to locate your USB disk drive.
lsblk
For, example, you can see the name of the USB drive as /dev/sdb.

3. After, in this step, we will write the Kali ISO to the USB drive using the dd tool. Use the following command and remember it requires root privileges.
Make sure you replace iso-name-here with the downloaded ISO in the below command. Also replace sbd with your own USB drive which you have found above. Refer to screenshot for better understanding.
sudo dd if=~/Downloads/_iso-name-here_.iso of=/dev/_sdb_

When you use this command then, it will remove everything from your USB drive, so make sure to back everything before using the above command.
When the process gets finished, then proceed to the next steps to install Kali Linux.
Step 2: Installing Kali Linux
1. Plug your USB and boot to the USB from the boot menu. To get into the boot menu, use F10 or F9 key. It may vary depending on your device manufacturer.
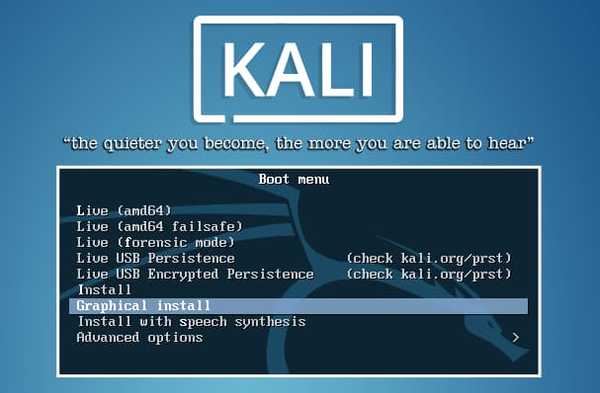
2. As soon as, you boot to the USB, you will see the screen like the following screenshot. Here you have the option to Install or Graphical install.
Here you can see some more options, but here we are dealing with Kali installation. So, select the Graphical install and press enter to begin the installation.
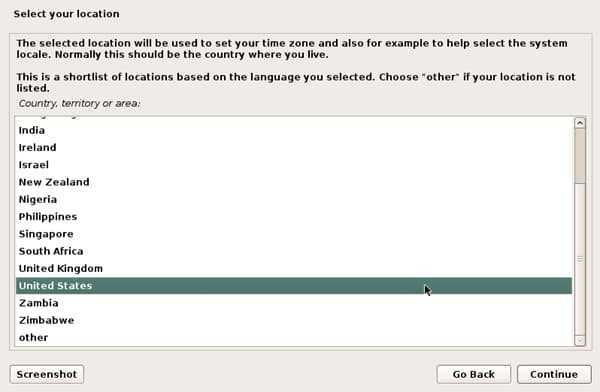
3. In this next couple of screens will require you to fill the locale information like the country, language, keyboard type etc.
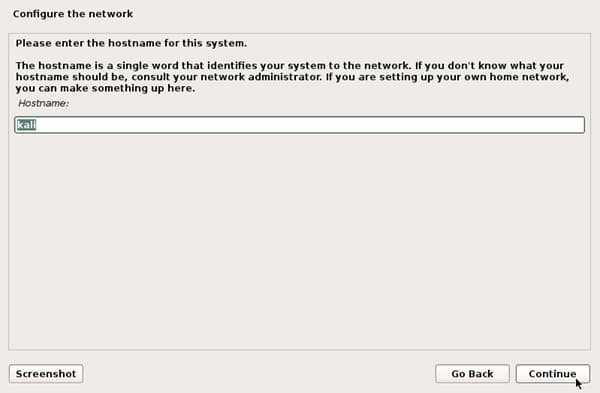
4. When, you are done with the user information, in the next screen, the installer will prompt you for hostname. Provide the appropriate information and continue installing Kali Linux.
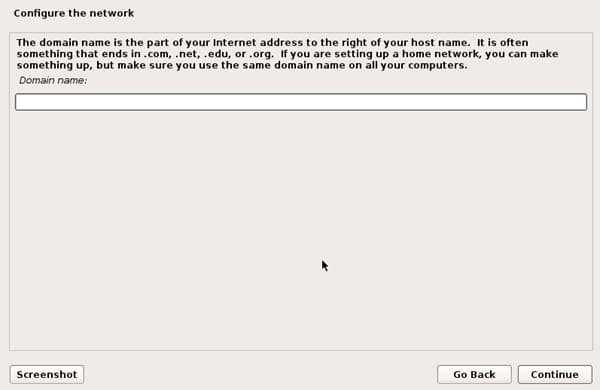
5. Next provide domain name, if you are not sure leave it blank and click next.
6. Now in the next screen, you will be required to provide root password. Make sure you remember the password you set here.
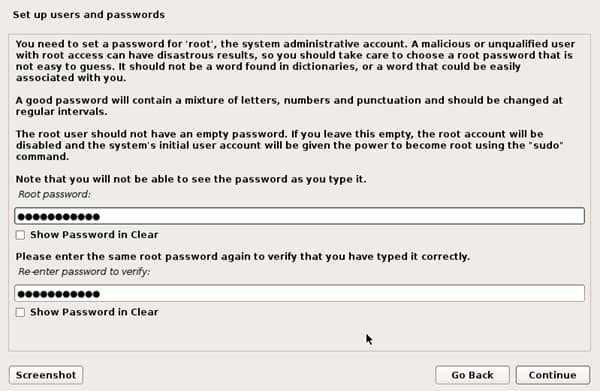
7. After setting the password, the installer will prompt you for the time zone.
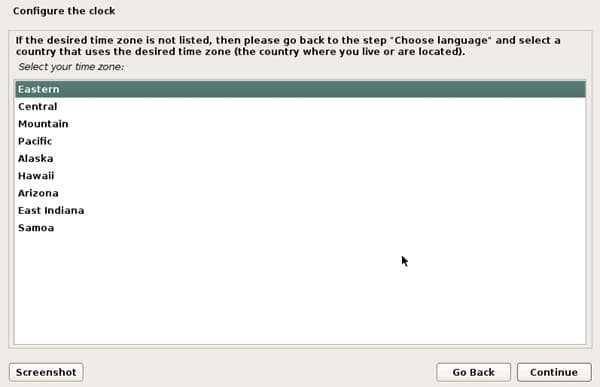
8. Now after you set the time zone, the next screen will be for disk partitioning.
If Kali will be the only operating on the machine, the easiest option is to use ‘Guided – Use Entire Disk’ and then select the storage device you wish to install Kali.
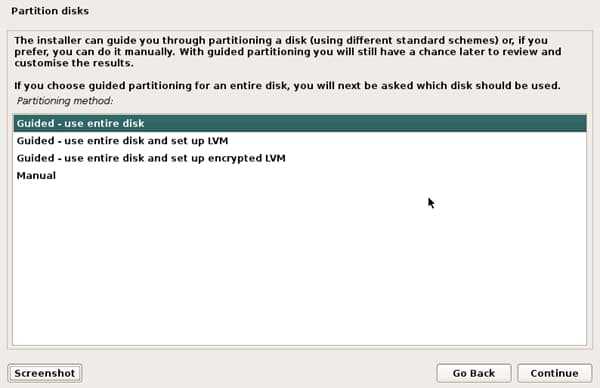
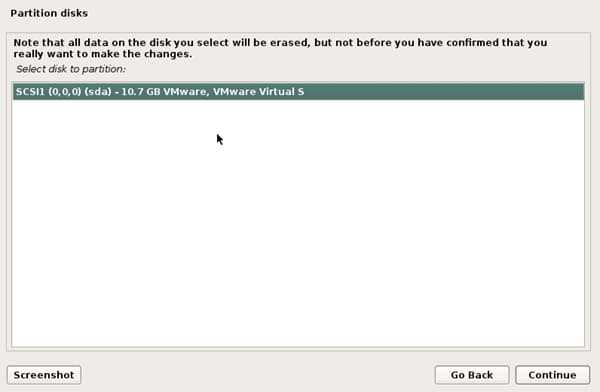
The next question will prompt the user to determine the partitioning on the storage device. Select installs can put all data on one partition though.
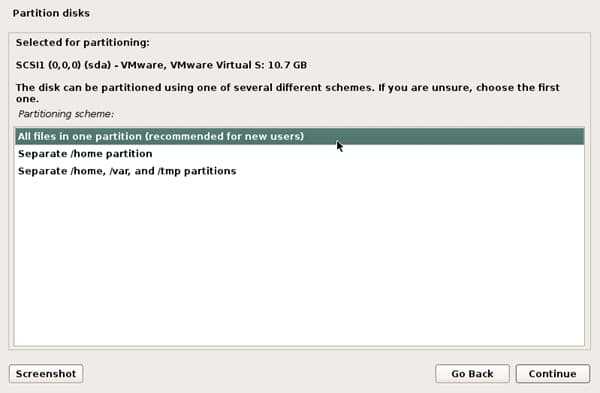
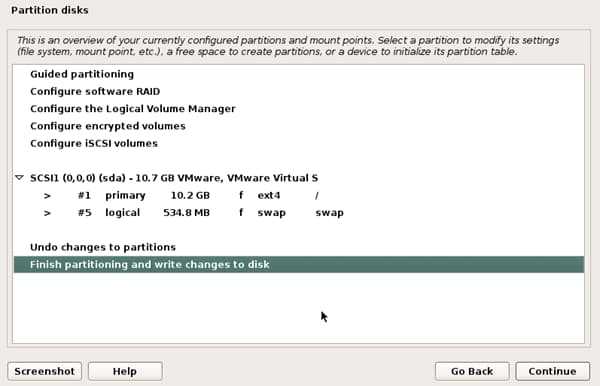
The final step asks the user to confirm all changes to the disk on the host machine. Be aware that continuing will erase data on the disk.
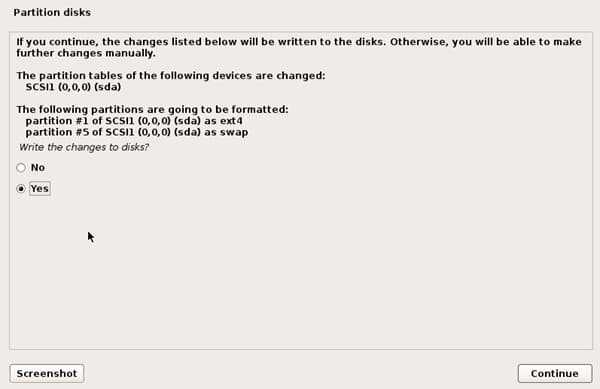
9. Once you have confirmed the partition changes. The installer will install files.
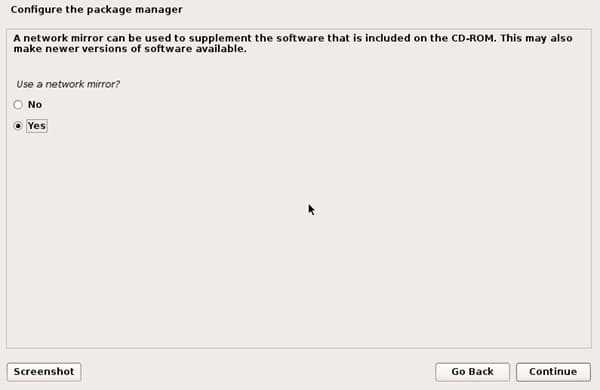
Once it completes, the installer will prompt you to set up a network mirror for obtaining future software and updates. Just select Yes, and press continue.
10. In the last step, the system will ask to install grub. Now Select, Yes and in the next screen. the hard drive to write the boot loader information to the hard drive to boot Kali.
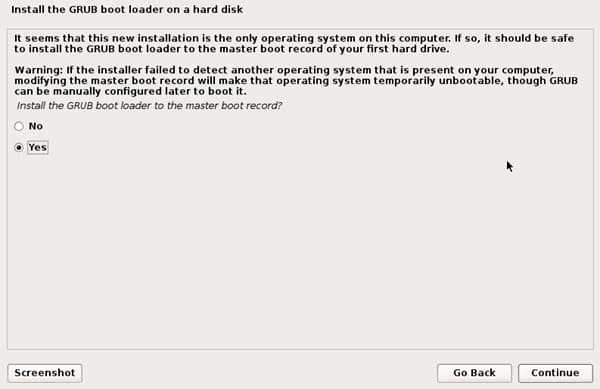
11. Once the installer finishes installing the GRUB to the disk, you can reboot the machine to boot into the newly installed Kali machine.
Once Kali is booted, use your root password to login to your Kali desktop. The root will be the default username, so in the username field, type "root".
Conclusion Install Kali Linux and Start Exploring
Kali Linux is one of the most popular Linux distros, and we are finished installing Kali Linux.
One more thing you should remember that you're doing everything as root, so its easy to mess things up. And make sure to keep everything up to date.
Do let me know which Linux distros are you using in the comment section below.
